Programming a keyboard with QMK on a Mac
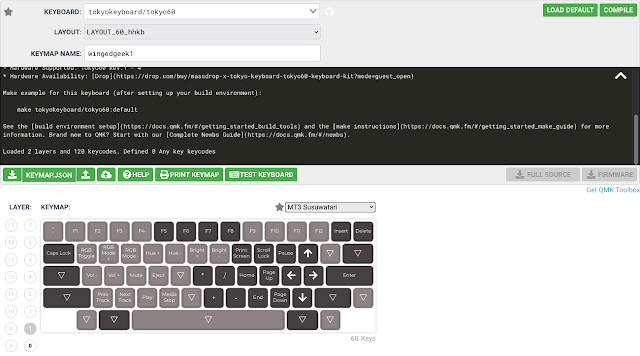
I finally decided to sit down and figure out how to install a new keymap onto my Tokyo60 builds (one, two). Modified Layer 1 (left Layer 0 intact) with this tool: https://config.qmk.fm/#/tokyokeyboard/tokyo60/LAYOUT_60_hhkb (the QMK Configurator). I set mine up like this:
 |
| Screenshot of my Layer 0 setup |
 |
| Screenshot of my Layer 1 setup |
I mapped the escape key to grave/tilde key for that tiny bit of 65% keyboard muscle memory I retain, because why not. The only other major changes I did was to add previous, next, and play/pause to Z X and C (“media stop” doesn’t seem to have any effect on a Mac), and to add more RGB controls - Hue +/- and Brightness +/-, to the RTYU keys, so I can change the solid RGB color and its brightness (I have the acrylic diffuser installed).
Next, I compiled the firmware with the button in the upper-right corner of the configurator, and once compiled, downloaded it (as tokyokeyboard_tokyo60_wingedgeek1.hex), and downloaded wingedgeek1.json, for good measure.
Set it up with the controller set to atmega32u4 and loaded the .hex file compiled by the QMK Configurator. It will initially say “No HID console devices connected” at the bottom of the window, and you won’t be able to do anything. That’s because the keyboard is not in bootloader mode. I found several guides that said you needed to hold down left shift, right shift, and Fn-P (for Pause), but that didn’t work for me, nor did Inspect see any “Pause” key in the default mapping.
What did work? Holding down left shift, right shift, and B, until this showed up in QMK Toolbox:
Atmel DFU device connected: ATMEL ATm32U4DFU (03EB:2FF4:0000)
Clicked the Flash button, waited a few seconds, and it was done:
 |
| Screenshot of QMK Toolbox after successfully flashing the Tokyo60 with a new keymap |
The Mac asked me about the new keyboard I’d attached, and I was in business:
 |
| macOS seeing a “new” keyboard attached |
Comments
Post a Comment